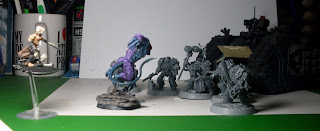
Let me start by saying that I hated this model when I originally saw the Advanced Order shot on Games Workshop's website. Owning this model and painting it has completely changed my opinion. I intend on getting two more. It was such a pleasure to paint. The sculptor gave us some awesome texture and depth to work with. I'm only a mediocre brush monkey and I've achieved an acceptable result. I'd love to see what a talented painter could produce with it. I started with the intention of making a tutorial, but after the first few steps I got lost in the act of painting and decided that it was such an easy model to work with that a tutorial would be redundant.
There are some downsides though. The model is big and heavy. I should have included a scale pic, but its about twice the size of a Space Marine. Pinning is pretty much mandatory. The model is split into four pieces. The main body, the right arm, the left leg, and the tail. Each piece should be pinned. Even the tail. Its tab and corresponding slot are not substantial enough to weather handling and transport in my opinion. There will be gaps after pinning so be sure to have green stuff available. The gaps will be small though so you won't have to be a GS expert to conceal it from anything, but the closest scrutiny.
I must admit to a bit of sticker shock. At nearly 23 USD the prospect of purchasing enough for a full Beast Unit was daunting, but the model has grown on me. I'm going to build it up to five Beastmasters(one metal and the rest converted from Hellions), three Clawed Fiends, four Khymerae, and two Razorwing flocks. Expensive, but it'll look great on the table and provide a solid assault unit via my Haemy's webway portal.
 |
| Finished model (aside from the base which still needs work) |
 |
| The components |
 |
| This is a simple base made out of pieces of cork. You can find rolls of cork in most stores. This was my first attempt at it so the results are a bit meh. I originally used PVA glue, but found that super glue produced better results and less separation between layers. |
 |
| It was easy to poke a hole through the cork with the peg at the bottom of the model's rock perch. The model itself is too heavy to not pin it to the base in some fashion or another. |
 |
| The body. Notice the aforementioned peg. The model had some flash, but surprisingly less than GW's metal models usually have. |
 |
| Dry fit front view |
 |
| I didn't fix the tale to the model during the painting process because it would have been too awkward. This is after priming it with Duplicolor Sandable Primer Dark Grey. My primer of choice available in most U.S. auto retailers for about 6 USD. |
 |
| After applying a basecoat of Games Workshop's Adeptus BattleGrey foundation paint to the fur and base. |
 |
| A basecoat of Modian Blue foundation followed by a wash of Asurmen Blue. Then a wash of Badab Black. Then I worked back up with a thin layer of Enchanted Blue. Then highlighted the raised areas with Enchanted Blue mixed with Vallejo Cold Grey. Mixing more grey in with the blue to create lighter highlights near the area where light might be hitting from overhead. This was just simple layering. As you can tell, I'm not the best of painters, but I feel it produced an acceptable standard for table top. |
 |
| Skipping a bunch of steps ahead...we have the nearly finished model. The fur was done with Vallejo's Hexed Purple and then mixing in White to varying degrees to provide a highlight which was dry brushed in appropriate areas. The face was just Mechrite Red base. Then Gory Red. Then Bloody Red. Then a highlight using just the side of the brush with a Bloody Red/Orange Fire mixture. |
Next model on deck is:


